A herbarium is more than a folder of pressed plants — it is a way to capture a moment in nature and keep it forever. For some, it is a scientific record; for others, it is a creative hobby or even a calming ritual. Well actually, the idea is simple: you collect leaves, flowers, or stems, press and preserve them, and then arrange everything in a way that tells a story. Unlike photographs, a herbarium lets you hold a piece of nature in your hands, noticing tiny details you might otherwise miss.
What makes the process exciting today is the mix of tradition and technology: in the past, creating a herbarium meant heavy books, endless notes, and careful drying. And while those classic methods are still beautiful, modern tools make everything easier and more engaging. Whether it’s using better materials for preservation or digital apps to help identify and track your plants, there’s now a way to give your herbarium both scientific value and personal charm.
Step 1: Gather Your Materials
Before heading outdoors, it’s smart to prepare a small set of tools. Luckily, you don’t need anything complicated or expensive—most essentials are already in your home.
Here’s a simple starter kit:
Cardboard or thick paper – to provide support and structure.
Parchment or blotting paper – to absorb extra moisture.
Scissors or small clippers – to trim stems and leaves neatly.
A plant press or heavy books – to flatten plants evenly.
Straps, clips, or rubber bands – to hold everything tightly together.
Pro tip: Always use acid-free paper. It prevents yellowing and helps your specimens look fresh for years.
And here is also a simple trick for you: if you don’t have a plant press, improvise! Stack a few magazines with parchment paper in between, secure them with rubber bands, and you’ll have a perfectly functional press.
Another idea is to prepare a small “field kit” with envelopes and a notebook. This way, when you spot an interesting plant on a walk, you can collect and store it safely until you get home.

Step 2: Choose and Collect Plants Wisely
This is the most enjoyable step: exploring outdoors and picking the plants you want to preserve. But it is important to do it thoughtfully: avoid rare or protected species, and remember that you only need a small sample — one flower, a few leaves, or a tiny branch is usually enough.
Well, once you decide to start, try to collect in the morning after dew has evaporated. Damp plants tend to mold, while slightly dry ones press cleanly and hold their shape.
Fun fact: Many old herbariums include not just the plant, but notes about the weather, the soil, and the exact location. Centuries later, these small details help scientists understand climate change and biodiversity.
Here’s a quick guide to make your collecting smarter:
Situation | Best Practice | Why It Matters |
Collecting leaves | Pick healthy, undamaged ones | They press more evenly and last longer |
Collecting flowers | Choose just-before full bloom | Colors and shapes stay more vibrant |
Time of day | Morning, after dew dries | Prevents mold and keeps plants fresh |
Type of plant | Skip rare or protected species | Ethical and sustainable collecting |
Life hack: Snap a quick photo of the plant in its natural setting. Later, when it’s pressed and flattened, you’ll still have a record of its original colors, size, and environment.
Step 3: Press and Dry Like a Properly
Now that you have your plants collected, it is time to press and dry them properly. This step is crucial, as it determines how your herbarium will look years later. And the main goal here is to keep the natural shape and color of the plant while removing as much moisture as possible.
Here’s a simple way to do it:
Prepare the layers. Place a sheet of blotting or parchment paper on top of a piece of cardboard. Lay your plant flat, making sure the leaves and petals don’t overlap too much. Cover it with another sheet of paper.
Add pressure. Place the layered plant inside a press or between the pages of a heavy book. If you’re using books, stack more weight on top to ensure even pressure.
Replace papers regularly. Every two or three days, change the blotting paper to keep the plant from molding. This step is often skipped by beginners, but it’s what separates a fresh, crisp herbarium from one with brown, blotchy specimens.
Be patient. Most plants take about one to three weeks to fully dry, depending on their thickness. Thin leaves dry quickly, while flowers with thick petals may take longer.
Pro tip: If you are short on time, you can speed things up. Use a hair dryer on the cold-air setting for a quick drying session, or place your plants in a container with silica gel packets to absorb moisture faster. Both methods help retain color and prevent curling.
The pressing stage may sound slow, but it’s worth the wait. The more carefully you do it, the more professional and lasting your herbarium will look.
Step 4: Organize and Label Your Herbarium
Pressing plants is only half the fun — arranging them into a collection is where your herbarium truly comes to life. You can think of it like building your own botanical library: you can use photo albums, sheets stored in folders, or even archival boxes. The format doesn’t matter as much as consistency and care.
Pro tip: Always label each specimen. At the very least, note the plant’s name, the date you collected it, and the location. These details turn a pretty leaf into a valuable record: even amateur herbariums have been used by scientists to track changes in local ecosystems and climate over decades.
Practical hack: Use archival-quality sleeves or acid-free mounting corners instead of glue. These materials help you to keep your plants secure while you will be still able to replace or remove them later (and even without damaging them).
Organizing your herbarium is about finding a balance between science and creativity. If you keep it simple or turn it into an artistic scrapbook, the important thing is that it reflects both the beauty of the plants and your personal connection to them.
Step 4: Organize and Label Your Herbarium
After your plants are pressed and dried, it’s time to arrange them into a collection that’s both functional and beautiful. You can use albums with clear sleeves, mount separate specimens on acid-free sheets, or store them in archival boxes — choose what suits your space and style. Labeling is essential: include the plant name, collection date, and location. Adding small notes about sunlight, soil, or bloom condition makes each specimen more informative and adds context. Even amateur herbaria can help scientists track changes in local flora and climate over time.
To keep your collection organized, here’s a simple approach:
Albums are perfect for easy viewing and casual browsing.
Individual sheets are suitable for a clean and scientific look, ideal for more detailed notes.
Boxes are perfect for storing larger collections or seasonal specimens.
Labels can help you to include essential information and optional observations.
And thanks to keeping your herbarium organized, each of your specimens can become a part of a story, and your hobby feels both rewarding and purposeful.
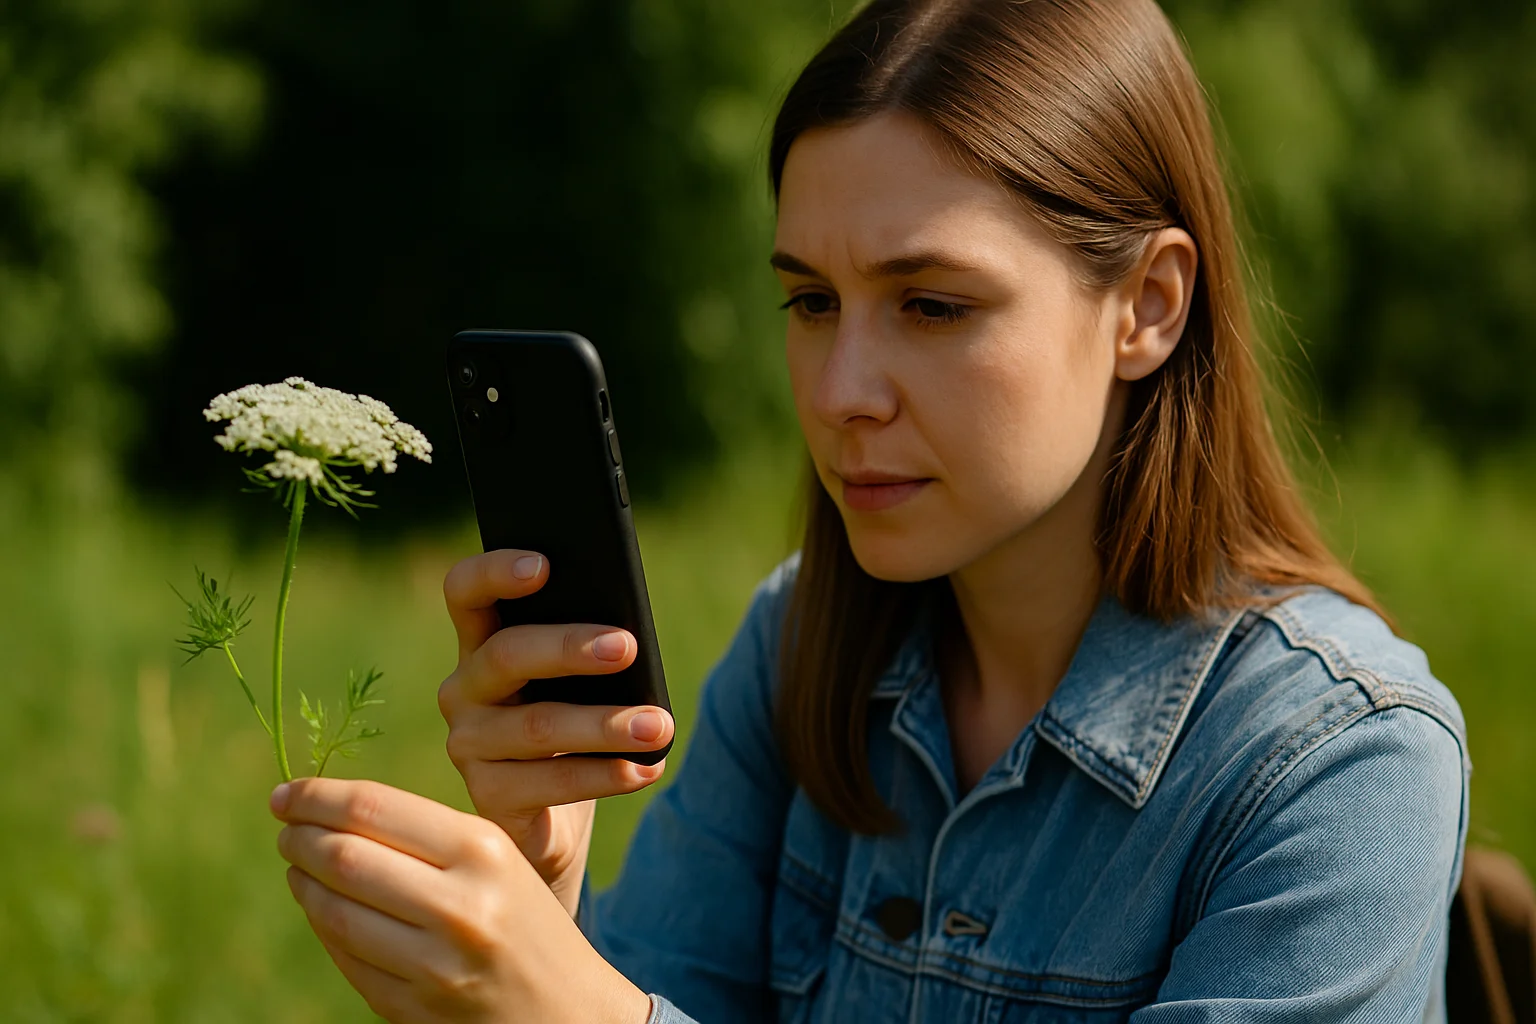
Step 5: Bring in Modern Technology
While traditional methods are timeless, technology makes creating and managing your herbarium easier. The AI Plant Finder app can identify plants from a photo, check their health, and even store your collection digitally. It means that now you are able to maintain both a physical and a searchable digital herbarium, combining the best of old and new techniques.
Maintaining a digital record also gives you the chance to track the growth and care of living plants alongside your pressed specimens, creating a richer, more complete collection.
Here is an example table for organizing your digital herbarium:
Feature | Purpose |
Photo | Capture color and shape before pressing |
ID | Confirm species via AI Plant Finder |
Care Notes | Track watering, pruning, fertilizing |
Collection Info | Date, location, weather, soil type |
Using digital tools alongside your physical collection makes your herbarium more interactive, easier to manage, and adds a modern twist to a traditional hobby.
Step 6: Display and Enjoy Your Herbarium
A herbarium doesn’t need to stay hidden away: all you need is just a little creativity to decorate it with your home or create a thoughtful personal gift. Pressed plants look beautiful in frames, shadow boxes, or even on greeting cards. Seasonal or thematic collections, e.g., “spring blooms” or “plants from vacation” — make browsing more engaging and personal.
Here’s a few ways to display your herbarium:
Framed pages – Turn pressed plants into wall art.
Shadow boxes – Add depth and protect delicate specimens.
Themed albums – Organize by season, location, or personal memories.
Digital backups – Photograph each page and store it in the cloud for easy access and sharing.
Combining thoughtful presentation with organized labeling and optional digital records makes your herbarium a collection you can enjoy every day.
A Living Story in Pressed Plants
Creating a herbarium at home is simple, rewarding, and endlessly inspiring. And due to combining old techniques with modern technology, you are able to create a collection that is beautiful and meaningful. With just a few tools and a touch of creativity, your herbarium can become both a scientific record and a personal thing to be proud of.